Team
Manage Users
The Team manager allows an authorized admin to review and grant access to the FutureFund Admin.
Permission Keys
Permission keys are a quick and easy way to view the permissions across all admins in the user manager. Each letter corresponds to a section in the Admin (e.g., R = First Step, S = Store, etc) where a solid color is enabled and inverse color is disabled. Hovering over the letter will reveal the name of the section.
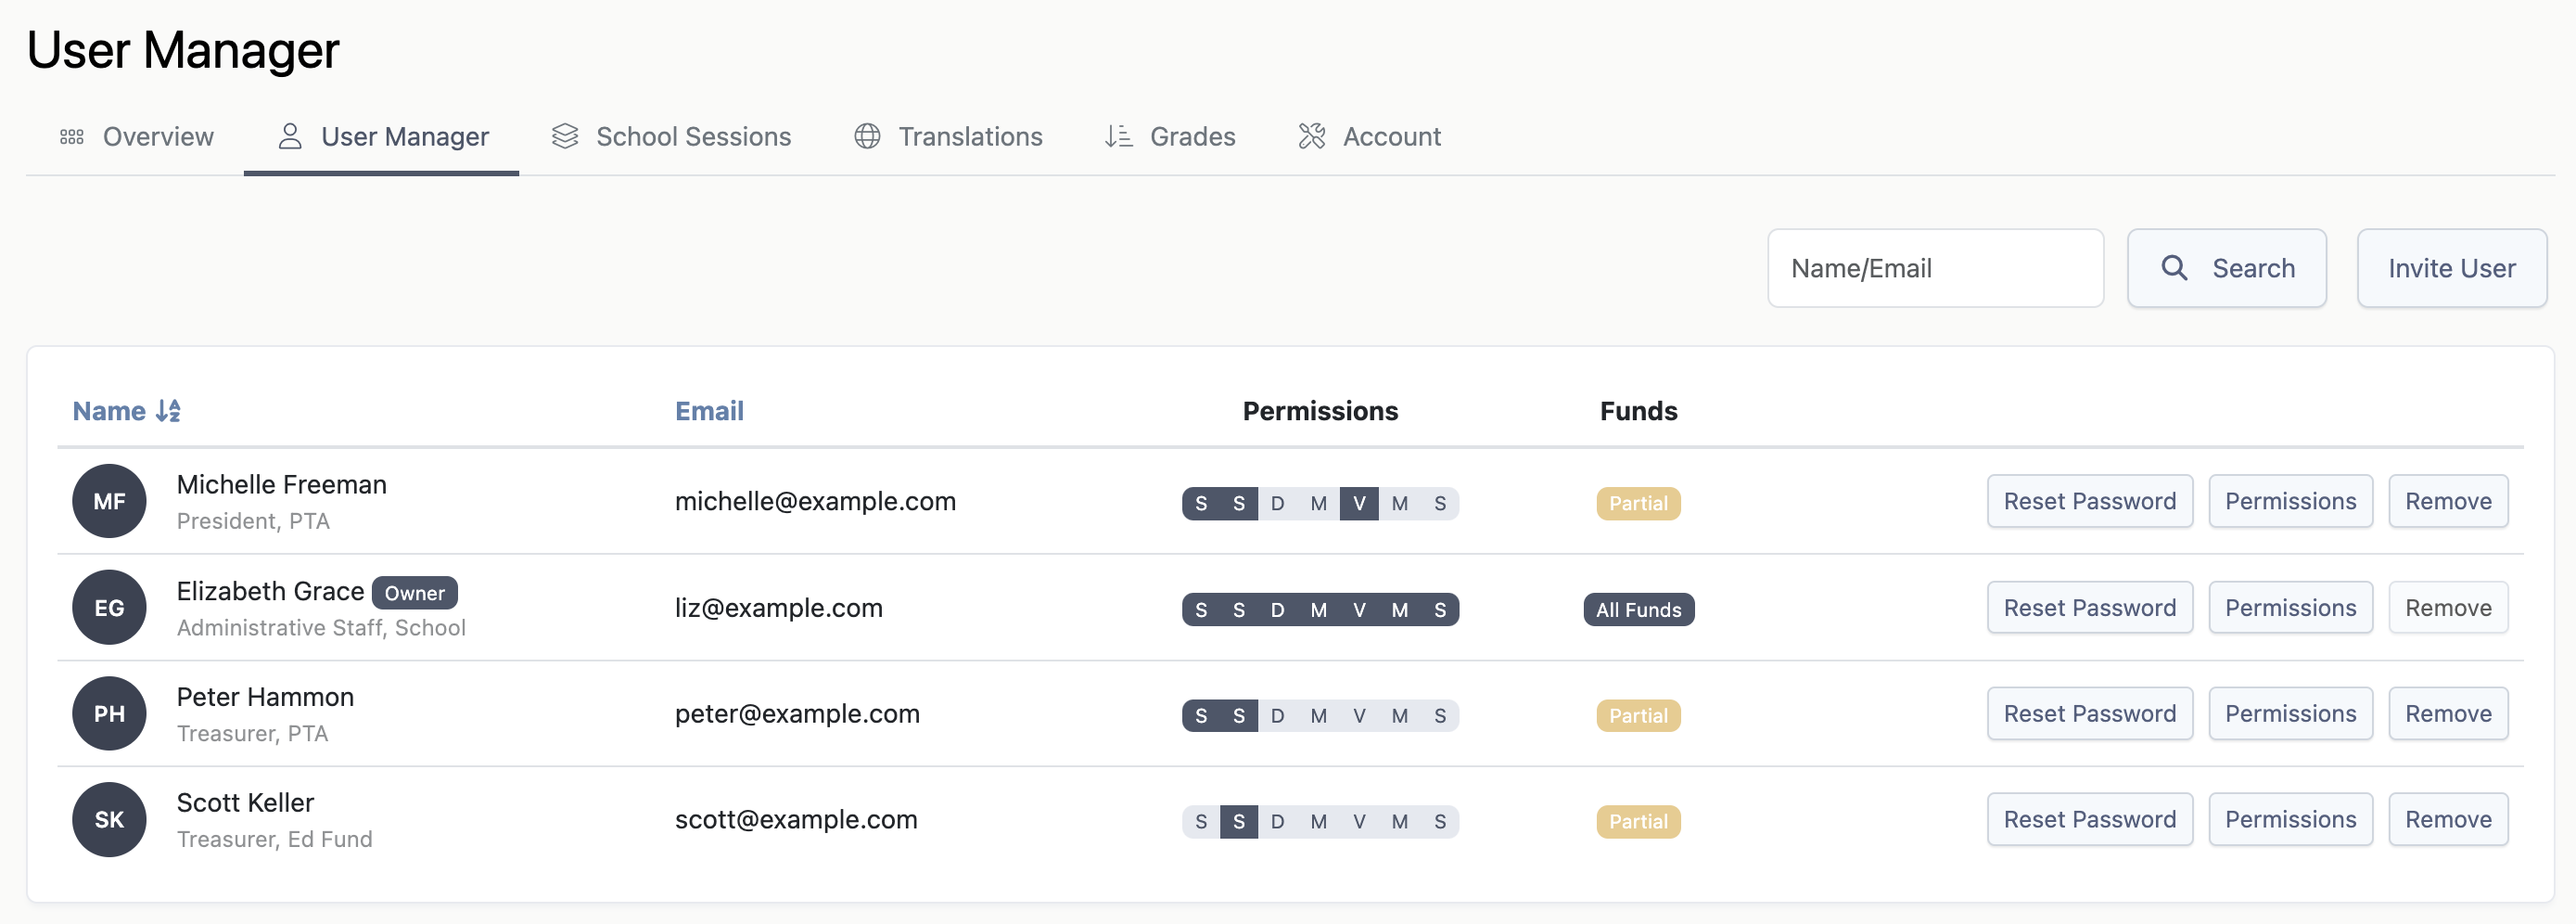
In the above example, Elizabeth Grace is the Owner and has permission to all sections. Whereas Scott Keller only has access to the Store.
Funds
The Funds column will show the funds the admin can access with the following labels:
- All Funds: The admin has access to all funds in the account.
- Partial: The admin has access to some funds, but not all funds.
- None: The admin does not have access to any fund.
Hovering over the Partial label will show the funds the admin can access.
Owner
The owner of the account will have the Owner label next to their name. To change the owner, see: Account Management in Settings
Adding Users
Users with the Settings permission can grant additional users the ability to access the administrative tools. To add a user:
- In the Admin, navigate to Settings > Team
- Click the Invite User button in the upper right corner of the page
- Enter the user’s information, click Invite
When a user is added, they will receive an email with a link to the admin site and instructions how to set their password if they do not already have one. If the user does not receive an email, please have them check their SPAM folder.
Removing Users
To remove a user:
- In the Admin, navigate to Settings > Team
- Click the Remove button next to the user’s name
When removing a user, access to the Admin is removed. The user’s account is not deleted and they are able to use it at other schools.
Access Expiration
Admins who do not access the Admin within a 13-month period will have their access automatically removed from the account. This does not apply to the owner of the account.
Permissions
Each user has permissions corresponding to the major sections in the admin:
- First Step
- Store
- Directory
- Membership
- Volunteer
- Messaging
- Settings
In addition to the sections, each user can be given access to each fund. Financial reports in the Store will be filtered by fund based on the permission setting.
Notes
- As a best practice, we recommend each user have a named account. Shared accounts (e.g., pta-treasurer@example.com) should not be used.
- Never share your password to your account with anyone including the support team at FutureFund.
- When using a public computer, be sure to logout when done using FutureFund.
- Users with the permission
Settingscan change their own permissions. - We recommend auditing users and permissions towards the end of the school year. Remove users no longer associated with the school and verify each user has the most restrictive permission and fund access.
Was this helpful?