Configuring Campaigns
Images and Attachments
Each campaign can have two images: a product image and a header image. The product image should be 200x200 pixels and the header image should be 600x300 pixels.
Attachments are displayed at the bottom of the campaign. These are used to make supplemental forms and information available to the purchaser. Attachments are displayed in alphabetical order by name.
Click on the Upload links to upload an image or the Upload Attachment button to add an attachment.

Negative and Positive Amounts
The campaign option amount can be positive or negative. However, the price of the campaign must be greater than or equal to zero. If campaign option combinations result in a negative amount, zero will be used for the amount.
Notes
- Changes to the name of the option will be reflected in reports, however, existing orders and carts will continue to show the value when the item was added to the cart.
- When a campaign option is removed, the option will remain in existing orders and carts.
- Campaign options do not support translations.
Use the Unit Sale Report to view sales summaries with options included.
Installments
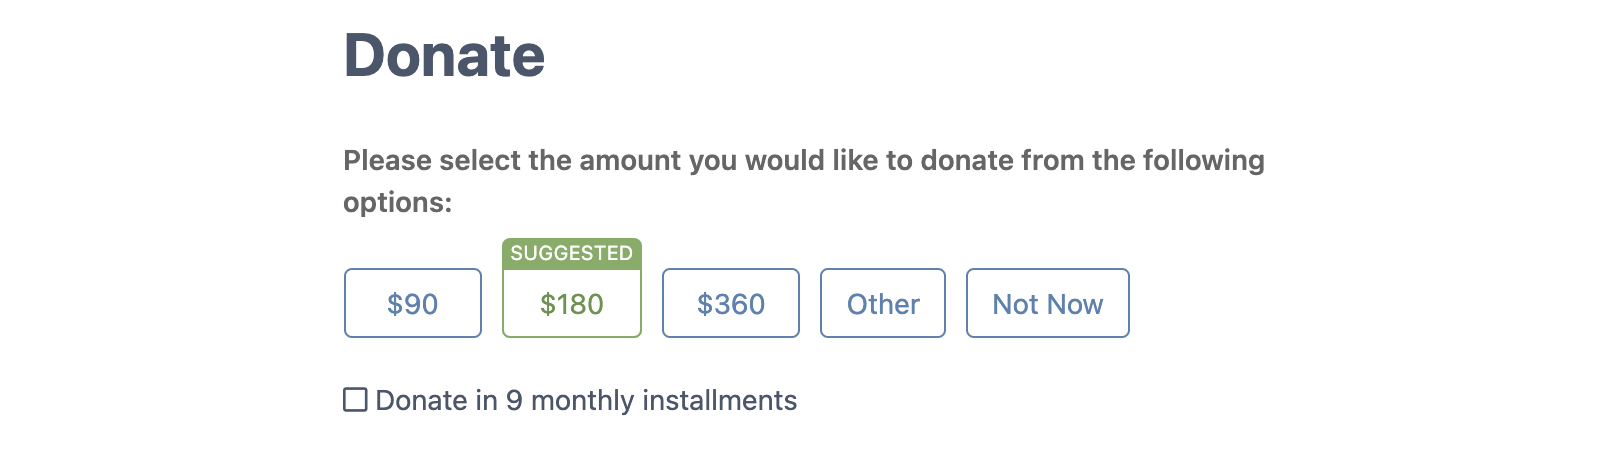
Donation Drive campaigns support installment plans. When making a purchase, the purchaser will be presented with the following option:
To enable installments:
- In the Admin, open the campaign under Campaigns
- Click on the View button next to the campaign
- Click on the Edit button in the Settings section
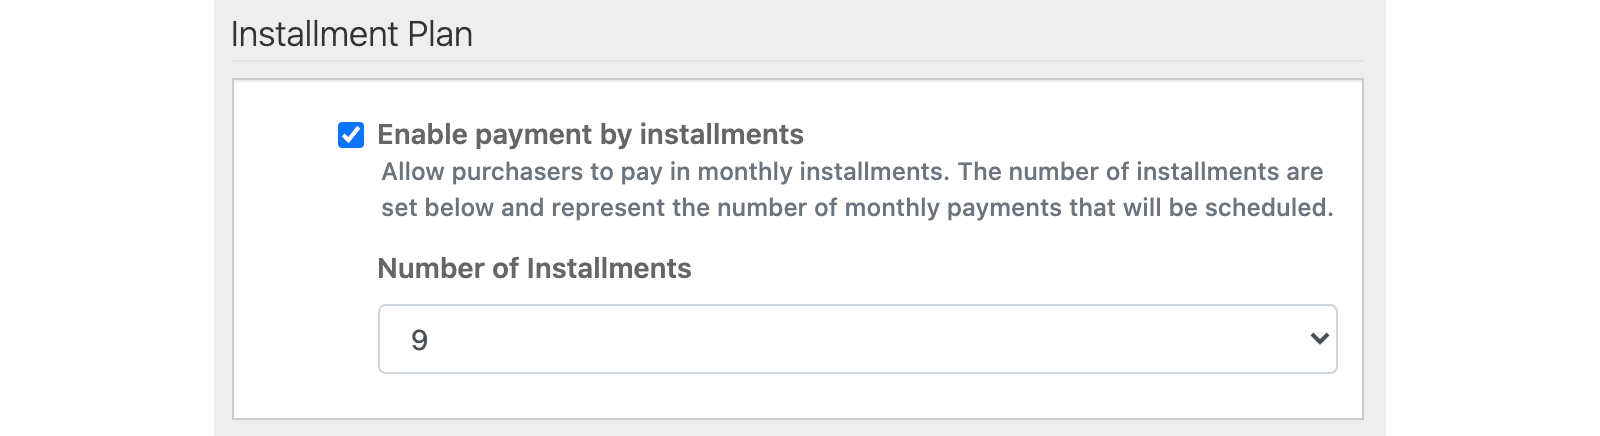
- Check the Enable payment by installments option
- Set the number of installments
- Click the Update Campaign button to save the change
FutureFund provides two reports to assist with managing installments:
Notes:
- Installments are available on Donation Drive campaigns.
- The number of installments is set by the administrator.
- Changing the number of installments will only impact new purchases.
- The payment frequency is fixed with monthly payments.
Suggested Donations
Donation Drive campaigns let you set up to four amounts for donors to choose from as tiles. Click the star on a tile to mark it as the suggested amount — it’s highlighted in blue and pre-selected for the donor at checkout.
To set a suggested donation amount:
- In the Admin, open the campaign under Campaigns
- Click on the View button next to the campaign
- Click on the Edit button in the Options section
- Click the star icon on the amount tile you want to suggest
- Click the Update Campaign button to save the change
Notes:
- Suggested donations are only available in Donation Drive campaigns.
- The suggested amount must be one of the four amount tiles.
- To let donors enter their own amount instead, check Let donors enter a custom amount under Advanced settings.
Auto-Select Campaign During First Step
During First Step, FutureFund will automatically select the suggested donation amount for a Donation Drive or Membership campaign when the ‘Automatically select campaign’ option is selected. The purchaser can change the selection on the purchase page. Donation Drive must have a suggest amount set and memberships must have an audience set to student or parent.
To enable auto-select:
- In the Admin, click on the View button next to the campaign
- Click on the Edit button
- Check the Automatically select campaign option in the Advanced Settings section
- Click the Save button to save the change
Having Your Organization Cover the Platform Fee
By default, your account-wide fee setting decides who pays the platform fee. If you want one specific campaign to always be fee-free for buyers, without changing that setting for everything else, open the campaign’s Options tab, expand Advanced settings, and check “Organization always pays the platform fee”. See Platform Fees for full details, including how mixed carts and bundles are handled.
This is available on Donation Drive, Purchase, Membership, Tiered Membership, Sign Up, Ticket, Pledge, and Campaign Bundle campaigns. Ticket campaigns can also turn it on from the campaign edit screen.
Tax Deductible
Campaigns marked as tax-deductible will display the following message on the purchase page:

The following information is displayed on the receipt:
Your donation is tax-deductible to the full extent provided by law. No goods or services were provided in exchange for your contribution. PTA is a 501(©)(3) nonprofit organization TAX ID: 00-000000000
If the purchase is over $250, the purchaser will receive a Tax Receipt at the end of the year when sent by an authorized administrator.
To mark a campaign as tax-deductible:
- In the Admin, open the campaign under Campaigns
- Click on the View button next to the campaign
- Click on the Edit button in the Settings section
- Check the The entire donation is tax deductible (no goods or services exchanged) option
- Click the Update Campaign button to save the change
Notes:
- This option can be changed at anytime and receipts will be updated in realtime.
- FutureFund supports donations where goods or services are not exchanged for the donation.
- It is the school’s responsibility to ensure the purchase meets IRS guidelines.
- Any campaign can be designated as tax-deductible.
Custom Forms
Some campaigns require collecting additional information or acceptance of a waiver when a purchase is made.
The form must be created before adding it to the campaign. See: https://support.futurefund.com/futurefund/forms-and-waivers/index
To require a form during a store purchase:
- In the Admin, open the campaign under Campaigns
- Click on the View button next to the campaign
- Click on the Edit button in the Settings section
- Select the form in the Forms & Waivers section
- Click the Update button to save the change

Notes:
- This feature is only supported for purchases made in the Online Store
- The purchaser cannot add the item to the cart until the form is completed
Videos
Videos can be displayed when a parent views the campaign page in the Online Store and during First Step. Videos must be hosted on YouTube or Vimeo and be publicly available (although they can be unlisted). To add a video:
- In the Admin, open the campaign under Campaigns
- Click on the View button next to the campaign
- Click on the Edit button in the Media section
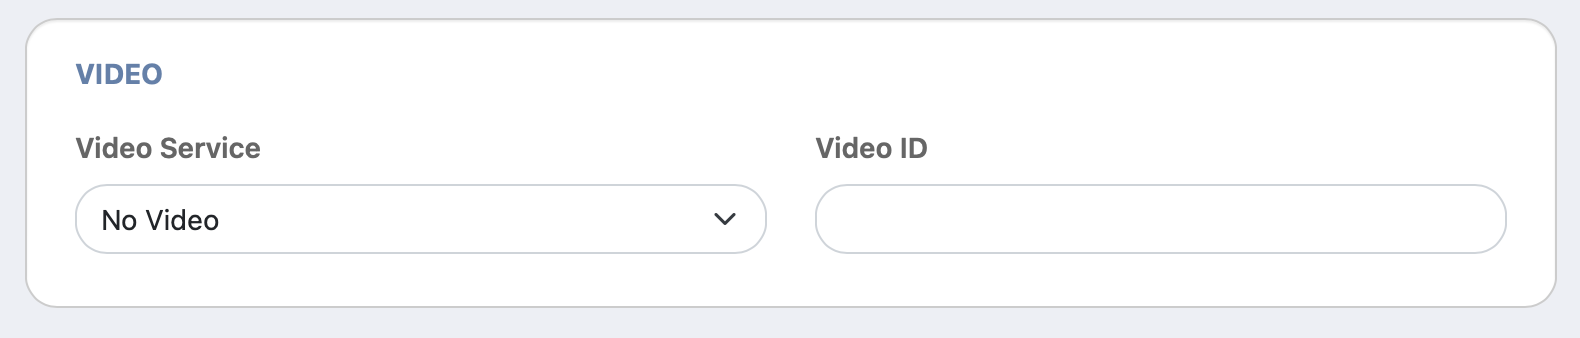
- Select the video service the Video section
- Enter the Video ID in the space provided. For YouTube videos, the video ID is the text that appears after the
v=. For example, in the following URL: https://www.youtube.com/watch?v=dQw4w9WgXcQ the video ID isdQw4w9WgXcQ - Click the Update Campaign button to save the change
Was this helpful?