Students
Searching
Students can quickly be found using the search box on the students page (Admin > First Step > Students). Search supports the following:
| Search Term | Type | Example |
|---|---|---|
| Student Name | Fuzzy | John Smith John Smith |
| Parent Name | Fuzzy | John Smith John Smith |
| Parent Email | Fuzzy | jsmith@example.com |
First Step Status
Students have a First Step status which is based on completion of First Step and monies owed.
- In Progress: The parent started First Step and did not complete First Step.
- Registered - Paid: The parent completed First Step for the student and paid any monies owed. This status will be applied if nothing was purchased and does not account for installment plans.
- Registered - Not Paid: The parent completed First Step for the student and has a balance on their purchase. This does not account for installment plans.
- Un-enrolled: The student is un-enrolled from the school session.
In Progress Sign-Ups
A student shows In Progress when a parent started First Step and stopped before finishing. To see more, find the student on the Students page and click View:
- Sign Up Started shows when the parent began.
- Parent shows the name and login email of whoever started the sign-up.
- The Parents section is empty if the parent stopped before reaching the page where parents are entered.
You can’t change the parent’s login email from the Admin. See Fixing a Mistyped Login Email below.
Reminder Emails
FutureFund emails the parent’s login email 1, 3, and 7 days after they started. The reminders stop once the parent finishes First Step.
To turn these reminders off for every family:
- In the Admin, go to Messaging > System Emails.
- Click Manage Reminders.
- Uncheck Reminder: Complete Your Student’s Registration!
- Click Save.
Fixing a Mistyped Login Email
If a parent typed their email wrong when they created their login, the reminders go to that wrong address. The parent can fix it:
- Go to accounts.futurefund.com.
- If they aren’t already signed in, sign in with the email exactly as it was typed, and their password.
- Click Personal Information.
- Change the Email Address and click Update User.
Clearing a Sign-Up
Use Clear Sign Up when a parent is having trouble finishing or wants to start over.
- On the Students page, find the student and click View.
- Click Actions > Clear Sign Up. This option only shows while the student is In Progress.
- Confirm. The message reads “Use this option when the parent is having trouble completing registration or wants to start over.”
You’ll see “Registration was successfully cleared.” The unfinished sign-up is deleted, along with the students and parents entered in it. The parent’s login stays, so they can start First Step again.
If you’re clearing a sign-up because the parent’s login email was mistyped, have them fix the email first (see Fixing a Mistyped Login Email above). They are usually still signed in on the same phone or computer, and First Step won’t ask for their email again. If they start over before fixing it, the new sign-up uses the mistyped address too.
Manually Adding a Student
We recommend students are added by the parents during First Step. There are cases when an administrator will need to manually add a student.
- In the Admin, navigate to First Step > Students.
- Click the Add Student button.
- Complete the form and click the Add Student button.
At this point the student is registered. Optionally, the parents can be added to the First Step as well. FutureFund supports up to four parents per student. This is done on the student detail page.

Viewing a Parent
To see everything on file for a parent, find their student on the Students page, click View, then click View next to the parent’s name in the Parents section.
The parent detail page shows their contact information, whether they have access to the directory, their employer and donation matching, and a Text Messages row showing whether they agreed to receive text messages from you. Yes means they can be reached by text; No means they will be skipped when you send one. You can change this on the parent’s Edit form if a parent asks you to sign them up or take them off.
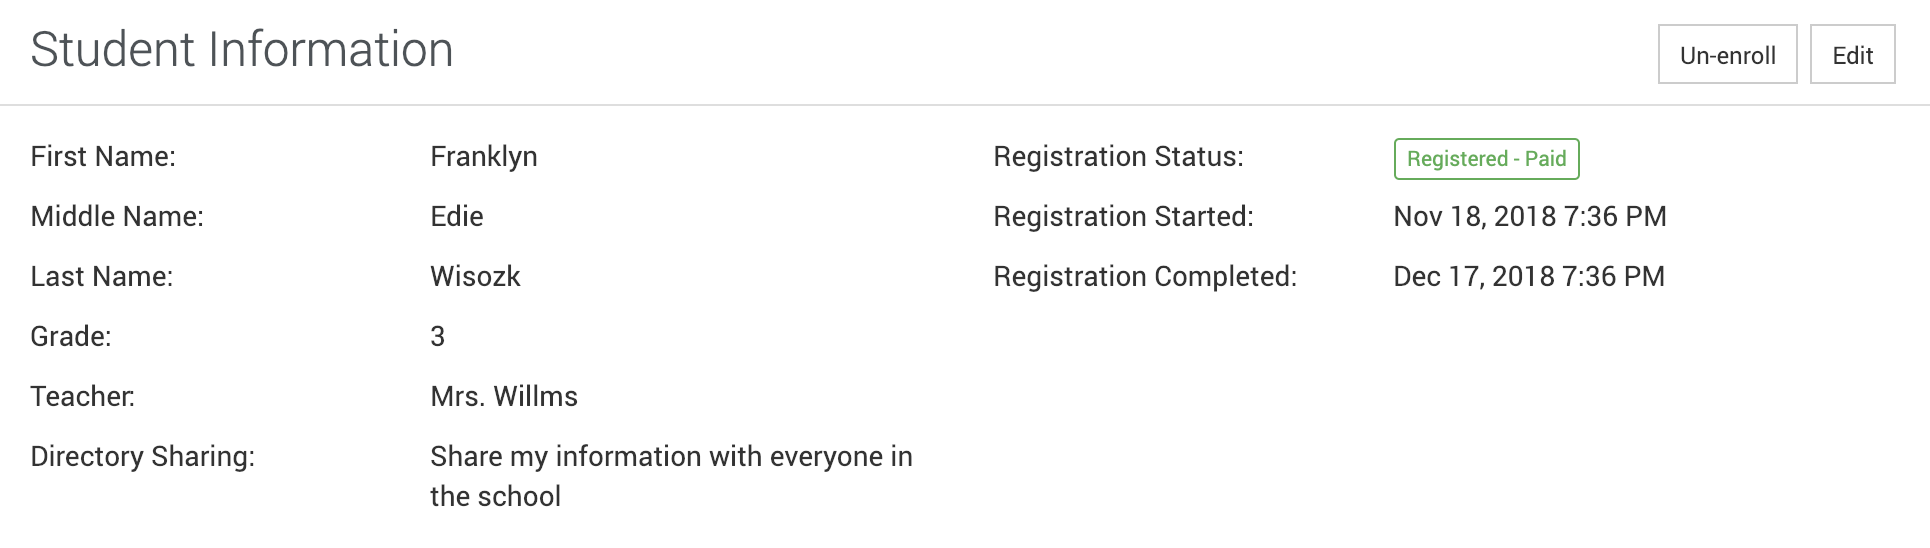
Un-enrolling a Student (Removing a Student)
In FutureFund, we support un-enrolling a student which will effectively remove the student from the system.
- In the Admin, navigate to First Step > Students.
- Find the student and click the View button.
- When viewing the Student detail page, click Actions > Un-enroll.
- A Delete Student dialog opens with options to remove aspects of the First Step:
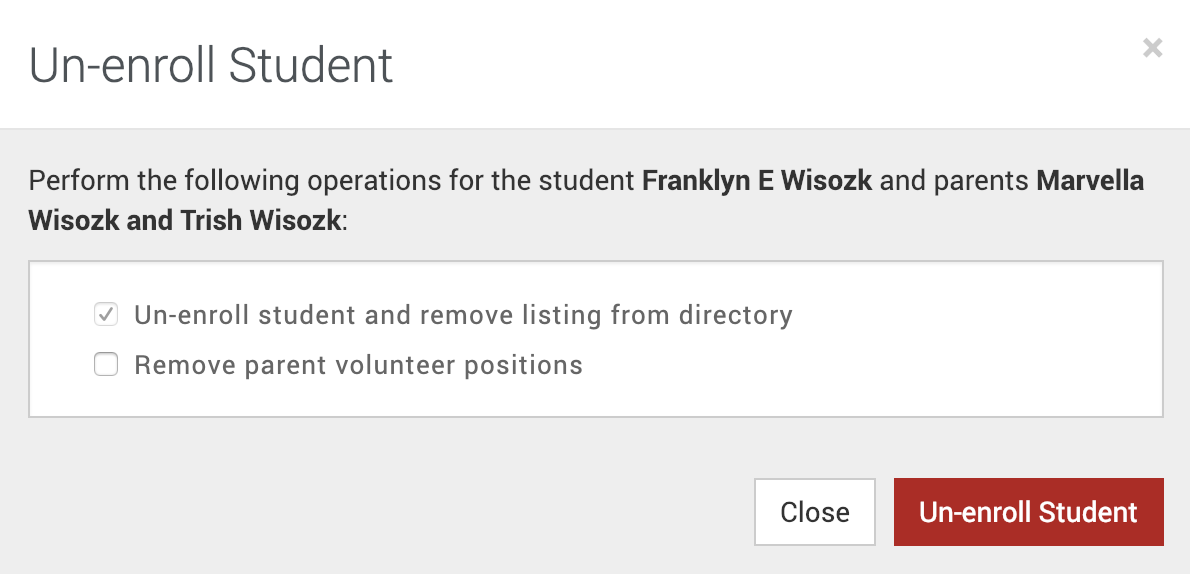
Please note the following when un-enrolling a student:
- Orders will not be automatically refunded. An administrator will need to manually refund purchases.
- The enrollment is a non-destructive change, however, removing other aspects of First Step, such as volunteering, is destructive.
Removing a Duplicate Student
Sometimes the same student shows up twice. This usually happens when a second parent signs in with their own login and goes through First Step. FutureFund starts a new sign-up for them. If they choose Continue signing up this student when told the student “has already been signed up for this school year,” a second record is created.
To remove the extra record:
- On the Students page, find both records. The Middle column can help tell them apart, since one parent may have entered a middle name and the other not.
- Click View on each and compare the Sign Up Started and Sign Up Completed dates. The later one is usually the extra.
- On the extra record, click Actions > Un-enroll.
- Leave Un-enroll student and remove listing from directory checked and the other boxes unchecked, so nothing else is removed.
Orders and tickets bought during the second sign-up stay in place. If the second parent is listed only on the extra record, add them to the remaining record with Add Parent so they stay in the directory.
Import
Students and their parents can be loaded in bulk from a CSV or Excel file. This is the way to bring a roster or a parent list in from another platform.
- In the Admin, navigate to First Step > Students.
- Click the Actions button.
- Choose Import Students & Parents.
- Select the file, then click Import.
File Format
The file must have these 22 columns, in this order. Every row is one student and up to two parents.
| # | Column | Notes |
|---|---|---|
| 1 | Student ID | Optional, may be left blank |
| 2 | Student First Name | |
| 3 | Student Middle Name | Optional |
| 4 | Student Last Name | |
| 5 | Grade Name | Required, and must already exist in your school year |
| 6 | Teacher Name | Optional, but must already exist if you enter one |
| 7 | Parent 1 First Name | |
| 8 | Parent 1 Last Name | |
| 9 | Parent 1 Email | |
| 10 | Parent 1 Phone | |
| 11 | Parent 1 Address | |
| 12 | Parent 1 City | |
| 13 | Parent 1 State | |
| 14 | Parent 1 Postal Code | |
| 15 | Parent 2 First Name | Leave the Parent 2 columns blank if there is only one parent |
| 16 | Parent 2 Last Name | |
| 17 | Parent 2 Email | |
| 18 | Parent 2 Phone | |
| 19 | Parent 2 Address | |
| 20 | Parent 2 City | |
| 21 | Parent 2 State | |
| 22 | Parent 2 Postal Code |
Notes:
- Set up your grades before importing, under Account Settings > First Step > Grades. A row whose Grade Name does not match one of them returns an error.
- A row with a Parent 2 Email fills in a second parent; leave those columns empty when there is only one.
- The import adds to your school year rather than replacing it, so importing the same file twice creates the students and parents twice.
Export
Students and parents can be exported as a CSV file, which opens in Excel or Google Sheets.
- In the Admin, navigate to First Step > Students.
- Click the Actions button.
- Choose Export Students or Export Parents.
- Tick the columns you want in the window that opens, then click Download.
Export Students
One row per registered student. Every file starts with these columns:
| Column | Description |
|---|---|
| First Name | First name of the student |
| Middle Name | Middle name of the student |
| Last Name | Last name of the student |
| Grade | Grade of the student, when your First Step asks for one |
| Teacher | Teacher assigned to the student |
| Registration Status | Whether the student is registering, registered or un-enrolled |
Two tick boxes decide what comes after them, and both are ticked for you:
- Include parent contact information adds a block of columns for each of the up to four parents on the student: first name, last name, address, city, state, zip code, email, primary phone and employer.
- Include registration form answers adds a column for each question you ask during First Step. The student’s answers follow the Registration Status column, and each parent’s answers follow that parent’s own block, so an answer always sits beside the person who gave it.
Untick both and you get the columns in the table above on their own.
Because the teacher and the parents’ contact details land on the same row, sorting or filtering the file by the Teacher column gives you class lists with contact information already attached.
Export Parents
One row per parent, with these columns:
| Column | Description |
|---|---|
| First Name | First name of the parent |
| Last Name | Last name of the parent |
| Email address of the parent | |
| Phone | Phone number of the parent |
| Text Messages | Yes if the parent agreed to receive text messages, No if they did not |
| Address | Street address of the parent |
| City | City of the parent |
| State | State of the parent |
| Zip Code | Zip code of the parent |
| Employer | Employer the parent entered, used for corporate matching |
Include registration form answers adds a column for each question you ask parents during First Step, after the Employer column.
The parent export includes every parent in your current school year, including parents who started First Step but have not finished it yet.
Naming the Answer Columns
Include registration form answers is offered only once you have asked a First Step question. Each answer column is headed with the question’s own name, so a question still carrying a default name like “Custom Selector” exports under that heading. Rename it under Operations > Forms & Waivers and the heading changes with it on your next export. See Forms & Waivers.
Was this helpful?