Organizations
Campaigns and Organizations
Campaigns are associated with a single Organization (previously called a Fund). When a credit card sale is made for a campaign, the money is deposited into the bank account associated with that organization at the time the deposit is made. This may be different than when the order is placed. See Changing the Bank Account below.
Creating an Organization
Creating an organization takes a few steps. After the first step, the organization can be assigned to campaigns while you set up your site.
Step 1: Add the Organization
- In the Admin, navigate to Account Settings > Organizations.
- Click the Add Organization button.
- Enter the name of the organization and its Tax Number (your EIN). The name and Tax Number will be displayed in the application. The name should be a short, descriptive name of the organization. It does not need to be the legal name.
- Press the Save button.
Once this step is complete, your organization is available for account setup and can be assigned to campaigns. To accept payments, continue to the next steps.
Step 2: Check the Tax Number
The Activate Payments form doesn’t ask for your Tax ID. It uses the Tax Number saved on the organization. A new account already has one organization, so check that its Tax Number is your organization’s real EIN before you activate payments.
- Open the organization: click View next to it on the Organizations list (or click Bank Information if that’s what your account shows).
- Click Edit.
- In Tax Number, enter your organization’s EIN in the form XX-XXXXXXX.
- Press the Save button.
Step 3: Activate Payments
Click the Activate Payments button next to the organization (or on the organization’s page).
Complete the form by filling out all fields: Legal Name, Payout Descriptor, address, Routing Number, and Account Number. The Legal Name must be the name of the organization associated with its Tax Number and must match the name on file with the IRS. The legal name and EIN can be verified here: https://apps.irs.gov/app/eos/. The bank account and routing numbers must come from a check, not a deposit slip.
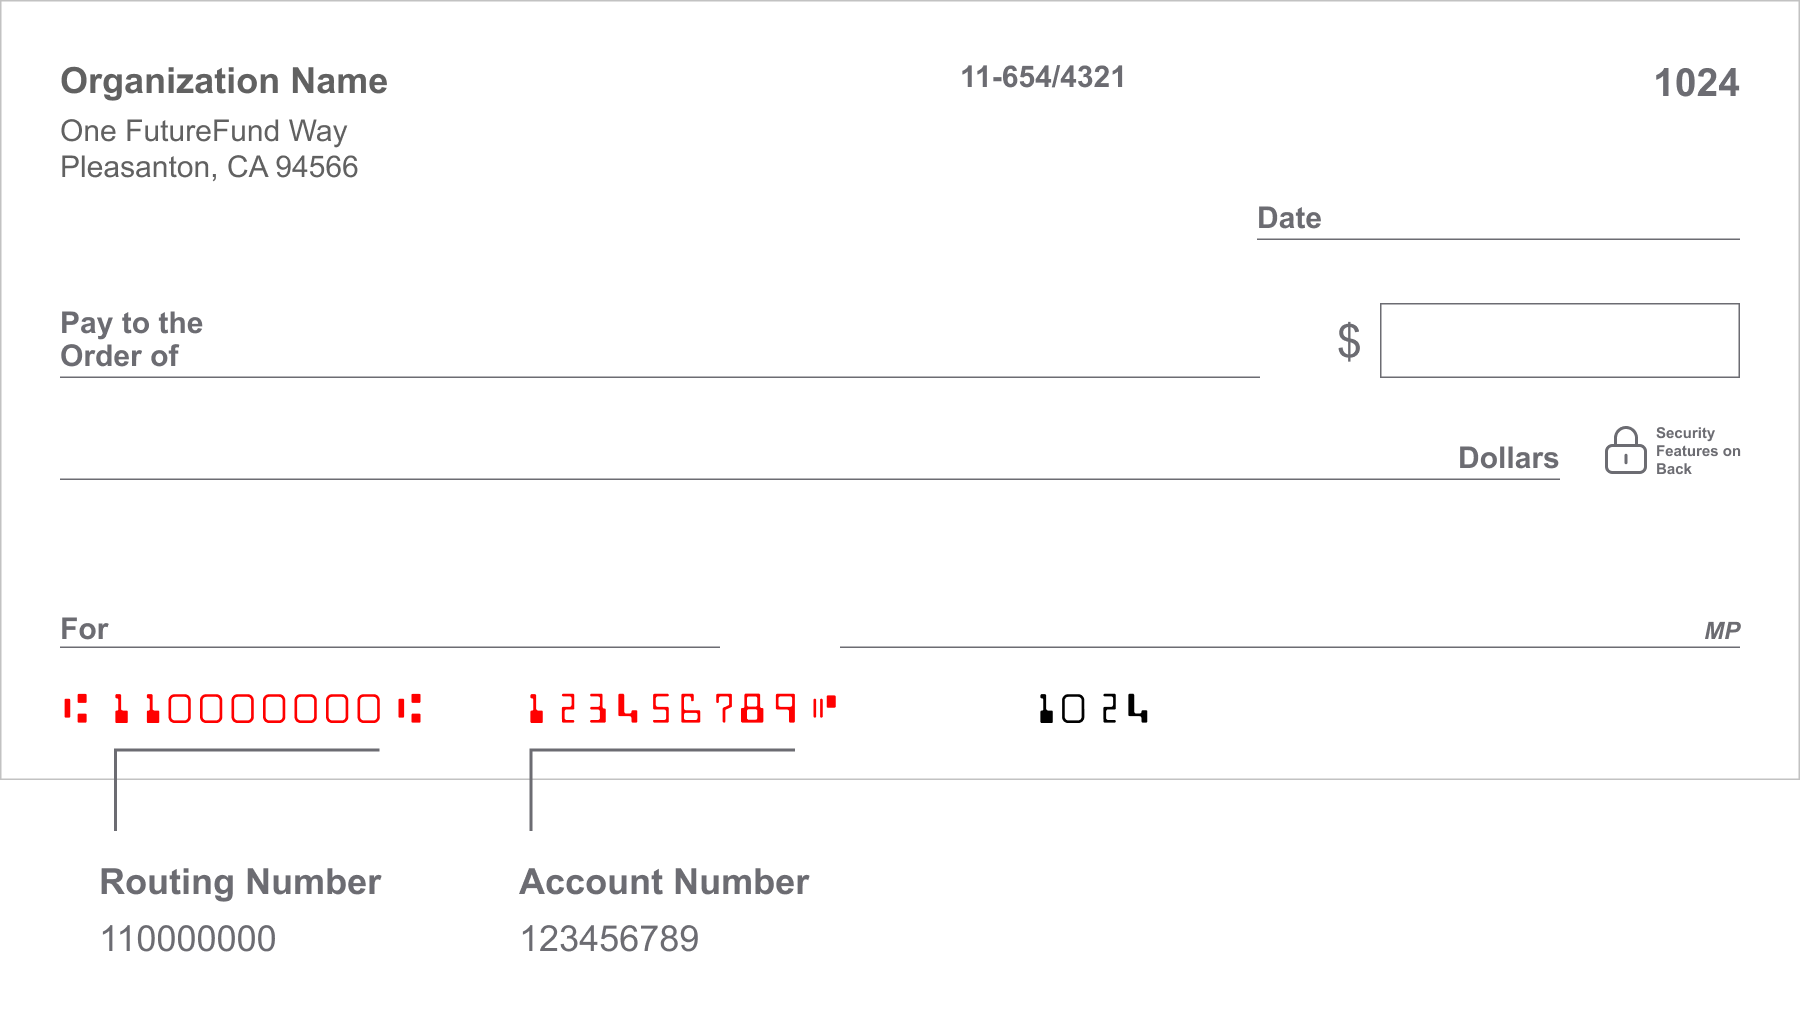
- Press the Save button.
Repeat these steps for each organization needed in your account.
Account Review
Every new account goes through a quick review before it can accept payments. When you activate payments on a new account, you’ll see “You’re connected! Your account is now under review, which typically takes 48 hours. You’ll receive an email when payments are enabled.”
While your account is under review:
- A banner reading Your account is under review appears on your Organizations page and on the organization’s page: “Thanks for activating payments! Every new account goes through a quick review, which typically takes 48 hours. You’ll receive an email when payments are enabled.”
- Families who try to pay see Payments Under Review, and orders can’t be accepted yet.
You’ll receive an email when payments are enabled. After your account is approved, any organization you activate later can accept payments right away, and you’ll see “You’re connected! This organization can now accept online payments.”
Payment Status
The Payment Status column on the Organizations list shows where each organization stands:
| Payment Status | What it means |
|---|---|
| Activation Needed | Payments haven’t been activated yet. Click Activate Payments. |
| Under Review | Payments are activated and your account is being reviewed. |
| Payments Activated | The organization can accept payments. |
If Stripe Needs More Information (“Action Needed”)
FutureFund uses Stripe to process your payments and send payouts. Every so often Stripe asks for something extra to keep an organization’s payments flowing — for example, a tax ID that doesn’t quite match IRS records, a missing detail on the account, or a payout that couldn’t be delivered. When that happens, that organization is marked Action Needed until it’s resolved, and:
- Your account owner gets an email explaining, in plain language, exactly what Stripe needs, along with a secure Update Information button that takes you straight to Stripe’s form. You can reply to that email directly if you have questions — it goes straight to our support team.
- A banner appears at the top of your Admin dashboard and on the organization’s page with the same explanation and button, until it’s resolved.
- The Organizations list shows an Action Needed badge next to the affected organization.
- If it’s still unresolved after a week, you’ll get a reminder email. Once you’ve supplied what Stripe asked for, you’ll get a confirmation email.
To resolve it, click Update Information from the email or the banner (only available to account admins), complete the form Stripe shows you, and submit. Most requests just need a form filled out — no need to contact support unless you’re stuck.
Changing the Bank Account
To change the bank account number, have the account owner email support@futurefund.com requesting the change. All changes require telephone verification for security purposes.
Please have the following information available:
- Existing Bank Name
- Existing last-4 digits of the account number
- New routing number (even if it is the same as the existing number)
- New account number (may not come from a deposit slip)
The change will be immediate. Any existing funds will be deposited into the new account.
Reviewing Your Campaigns Before Launch
To review your campaigns and pricing the way a parent will see them, use Preview. There is no test credit card, so if you need to confirm the full checkout flow, see Previewing First Step for how to do that safely.
Organization Access
Team members can be granted access to specific organizations. See Team: Organization Access for details on configuring organization access.
Was this helpful?